


Archive Products is a useful widget of ShopEngine letting you do tons of customizations. The widget has an array of options in the Layout and Style tabs that you can utilize to bring out your desired archive product appearance.
You can tweak the background color and add all the necessary elements like product title, price, category, add to cart button, and many more things. By making all these necessary changes and adjustments, you can pull the attention of the shoppers.
How does the Archive Products Widget Work?
Step 1: Add New ShopEngine Template #
Go to the dashboard of your admin panel and find ShopEngine from the list of items.
- Click Builder Templates
- Click the Add New Template button on the top right beside the text Builder Templates

Immediately after that, a popup window will show up for template settings.
- Click Edit with Elementor or save changes
- Enter a template name
- Select the type Archive/Shop as your goal is to check out the Archive Products widget.
- (Optional) Select a product category
- Enable Set Default if needed
- Choose a pre-made layout or build your own with widgets

Step 2: Find the ShopEngine Archive Products Widget #
In this step, you will notice a sidebar on the left with a list of ShopEngine widgets. Find the Archive Products widget from the ShopEngine Product Archive section, or you can normally search for the widget in the search field and then drag and drop it to the designated area.

Your archive products will show up soon after that.
Step 2: Change the Layout #
Since ShopEngine no longer provides a layout settings option on the Shop Page, you can change the layout using the WooCommerce customization options. To customize layout options, from the front end –
- Go to Shop Page
- Click on the Customize (customizing the shop page will change the layout of the archive page as well)

Once the options open, go to WooCommerce ⇒ Product Catalog. Here you can change –
- Products per row
- Rows per page
- Products per row in Mobile
- Products per row in Tablet
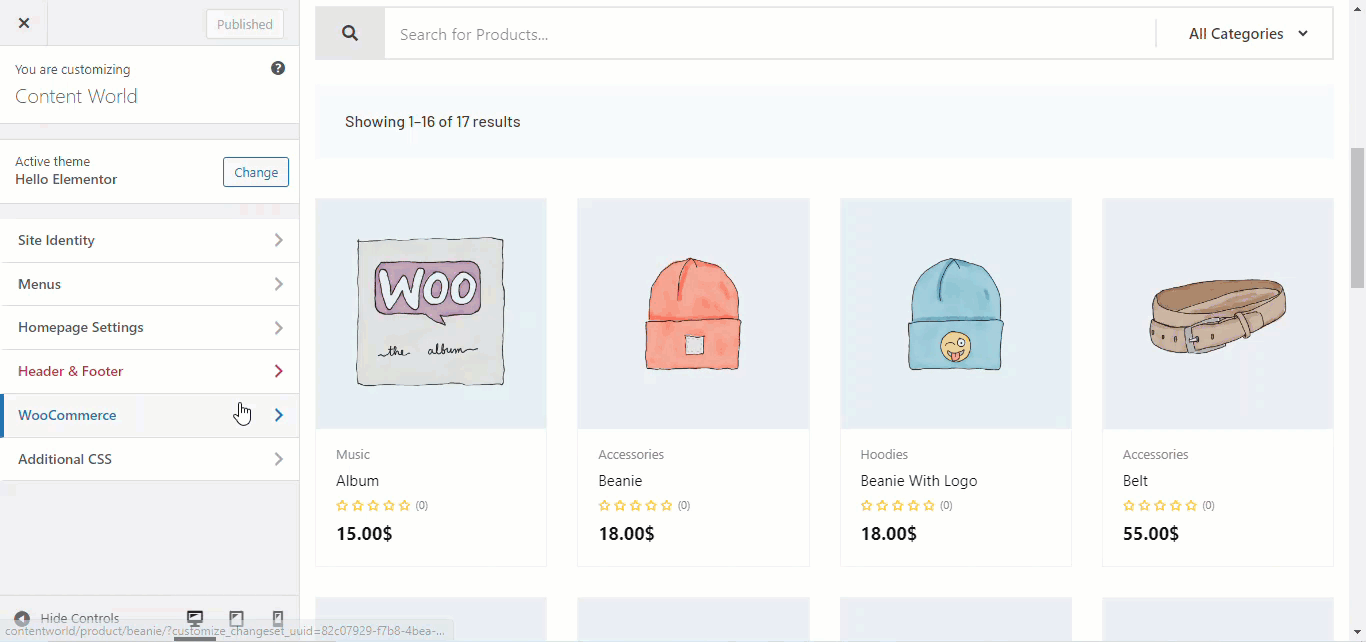
Once you make the changes, click on Publish to save.
Step 3: Customize the Archive Products Widget #
Now in the back end, you can work with the editing options of the Archive products widget. There are different elements in each option, in the Layout section-
- Layout- As we have shown above, in this section you can manage the number of columns and rows from the customizer.
- Content- In this section, you will find elements like Flash Sale Badge, Show Categories, Show Regular Price, Rating, Add Tooltip, etc. All these elements have SHOW and HIDE options. Just click each of them to observe their functions and use them accordingly.
- Pagination- You will find different pagination styles and icons here.
- Custom Ordering- If you enable Ordering List here, you can see options for it Quick View, Comparison, Wishlist, and Add to Cart.

Along with that, you have more customization options in the Style tab like Product Image, Product Title, Product Price, Add to Cart button, etc. You can make a plenty of more tweaks and adjustments by clicking each of these options.

The archive products show up as displayed below on the front-end-
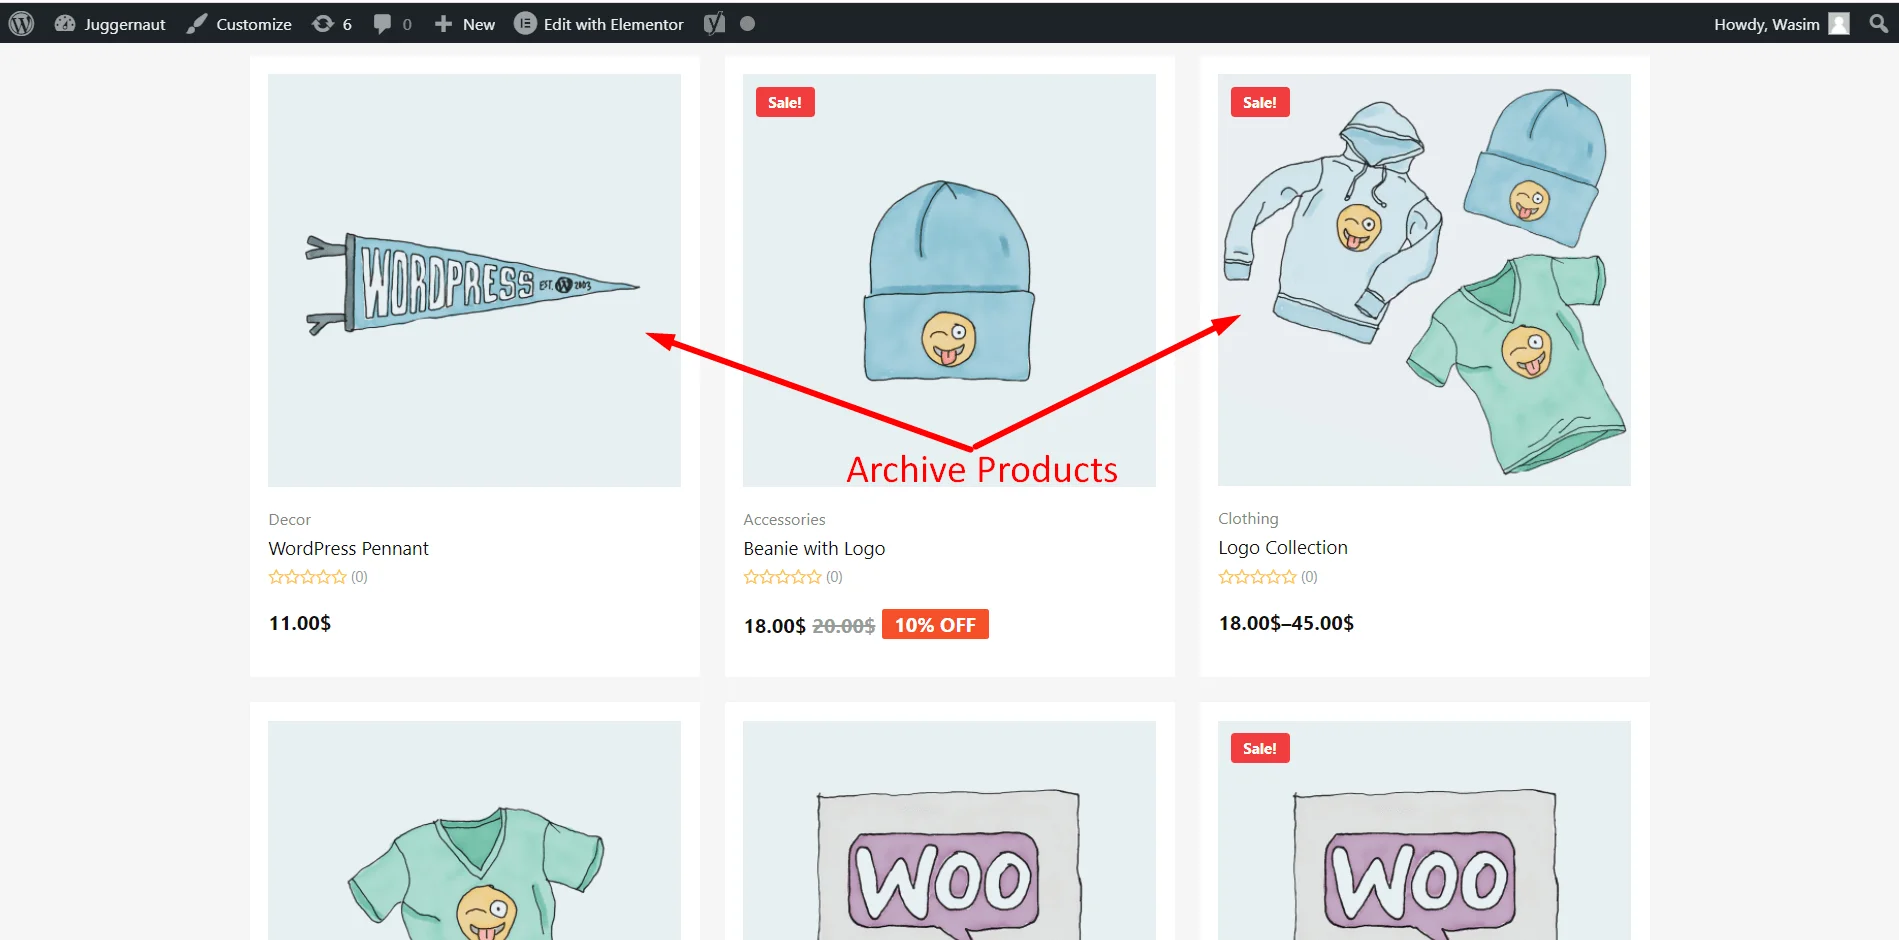
This is how you can deploy the Archive Products widget of ShopEngine. It will help to display archive products exactly how you arranged them for your website visitors.


